
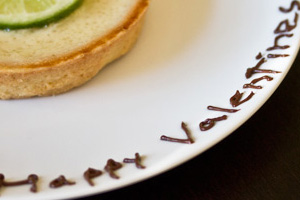
HOW TO WRITE ON A PLATE WITH CHOCOLATE
Surprisingly quick and easy to do once you know the trick, piping chocolate is a great way to send a message with your dessert. Of course, the same technique used for letters can also be used to pipe more elaborate chocolate designs if you're feeling particularly artistic.
The secret to making chocolate pipe-able is to ruin its texture on purpose: adding a tiny amount of water to cause it to "seize". This thickens the chocolate for better control, more stability, and more height on the plate.
Practice definitely makes perfect when it comes to decorating the plate, so make extra chocolate your first time.
INGREDIENTS
- Dark Chocolate
- One or more Cornets/Paper Piping Bags (how to make a paper piping bag)
DIRECTIONS
When the melted chocolate seizes it will take on a thickened, almost grainy appearance, like this:

Pro tip: Pipe the chocolate onto your dessert plate before arranging the food, so it’s easier to clean if you need to start part or all your design over again.